Starting Palette
The starting palette in Trycolors is a set of base colors you use for mixing. This guide will show you how to change your starting palette in the mixer and how to create or edit your own custom palette.
Changing the Starting Palette in Mixer
Follow these steps to change the starting palette in the mixer:
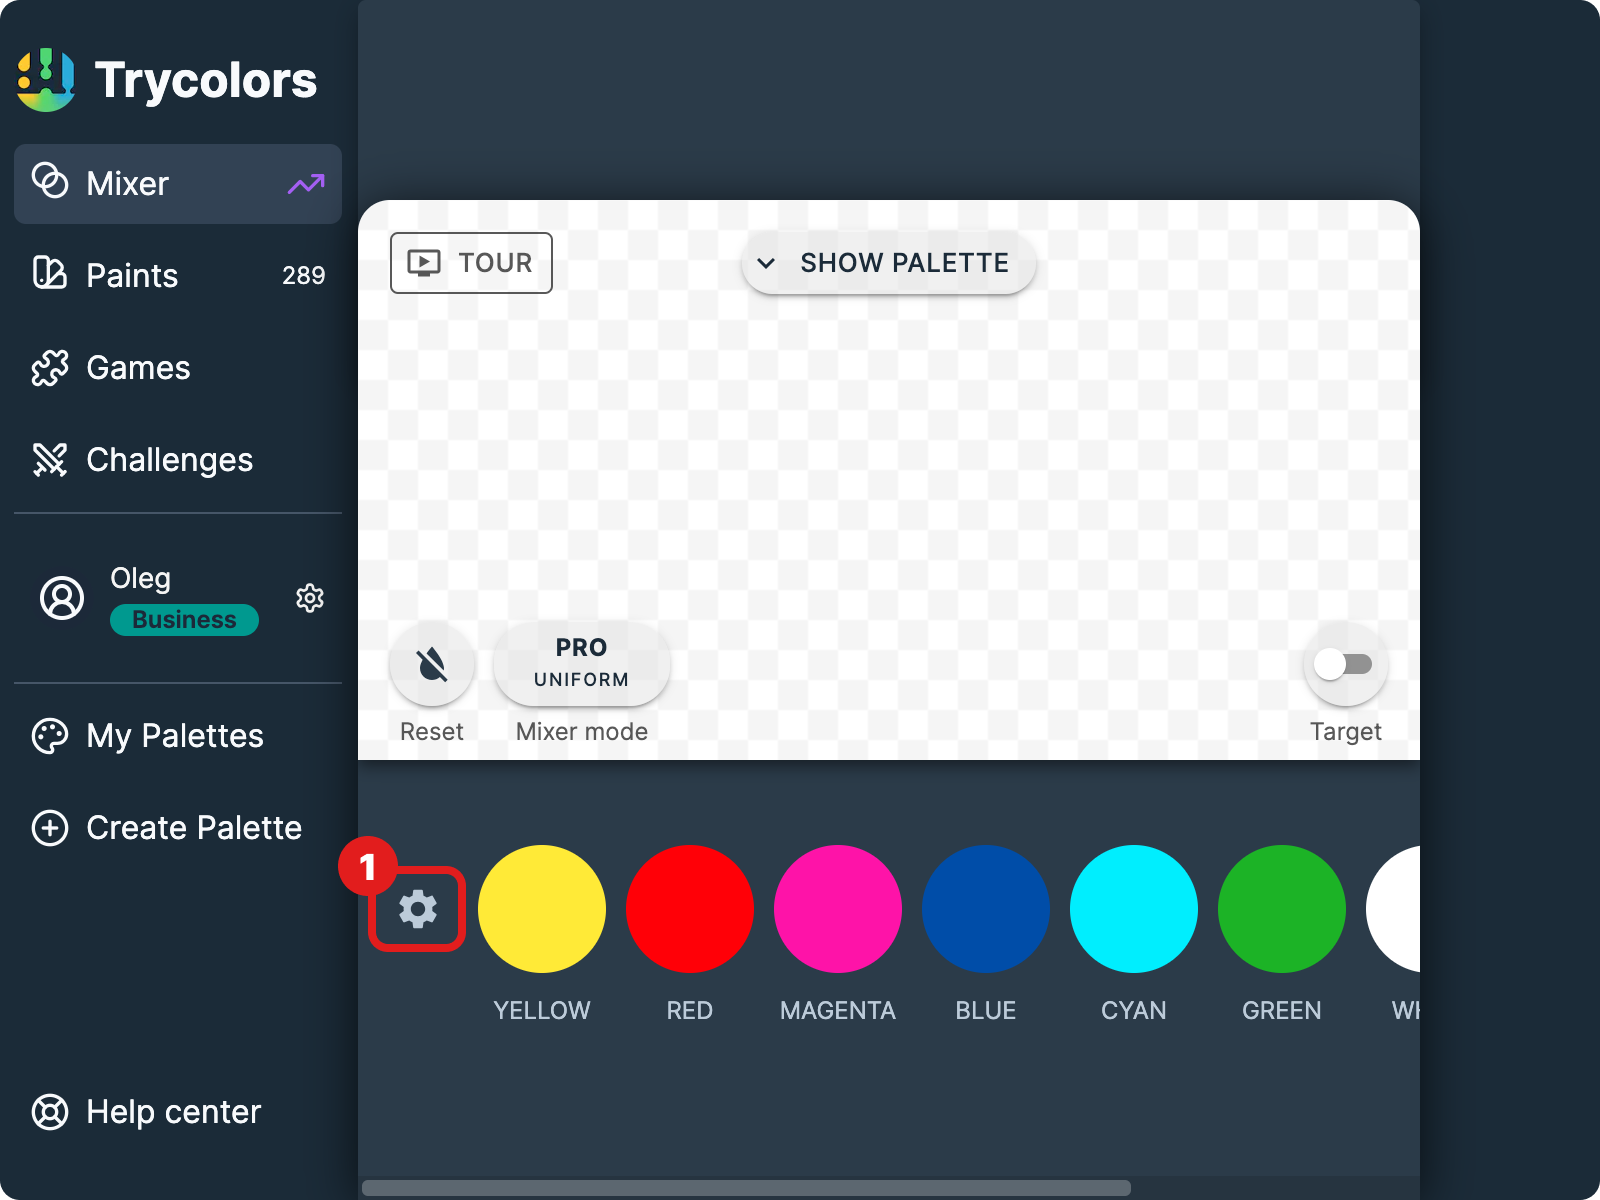
Open the Starting Palette Modal
Click on the gear icon (settings) next to the starting colors in the mixer.
Select a Palette
In the modal, you'll see default palettes and your custom palettes. Click on the radio button next to the palette you want to use.
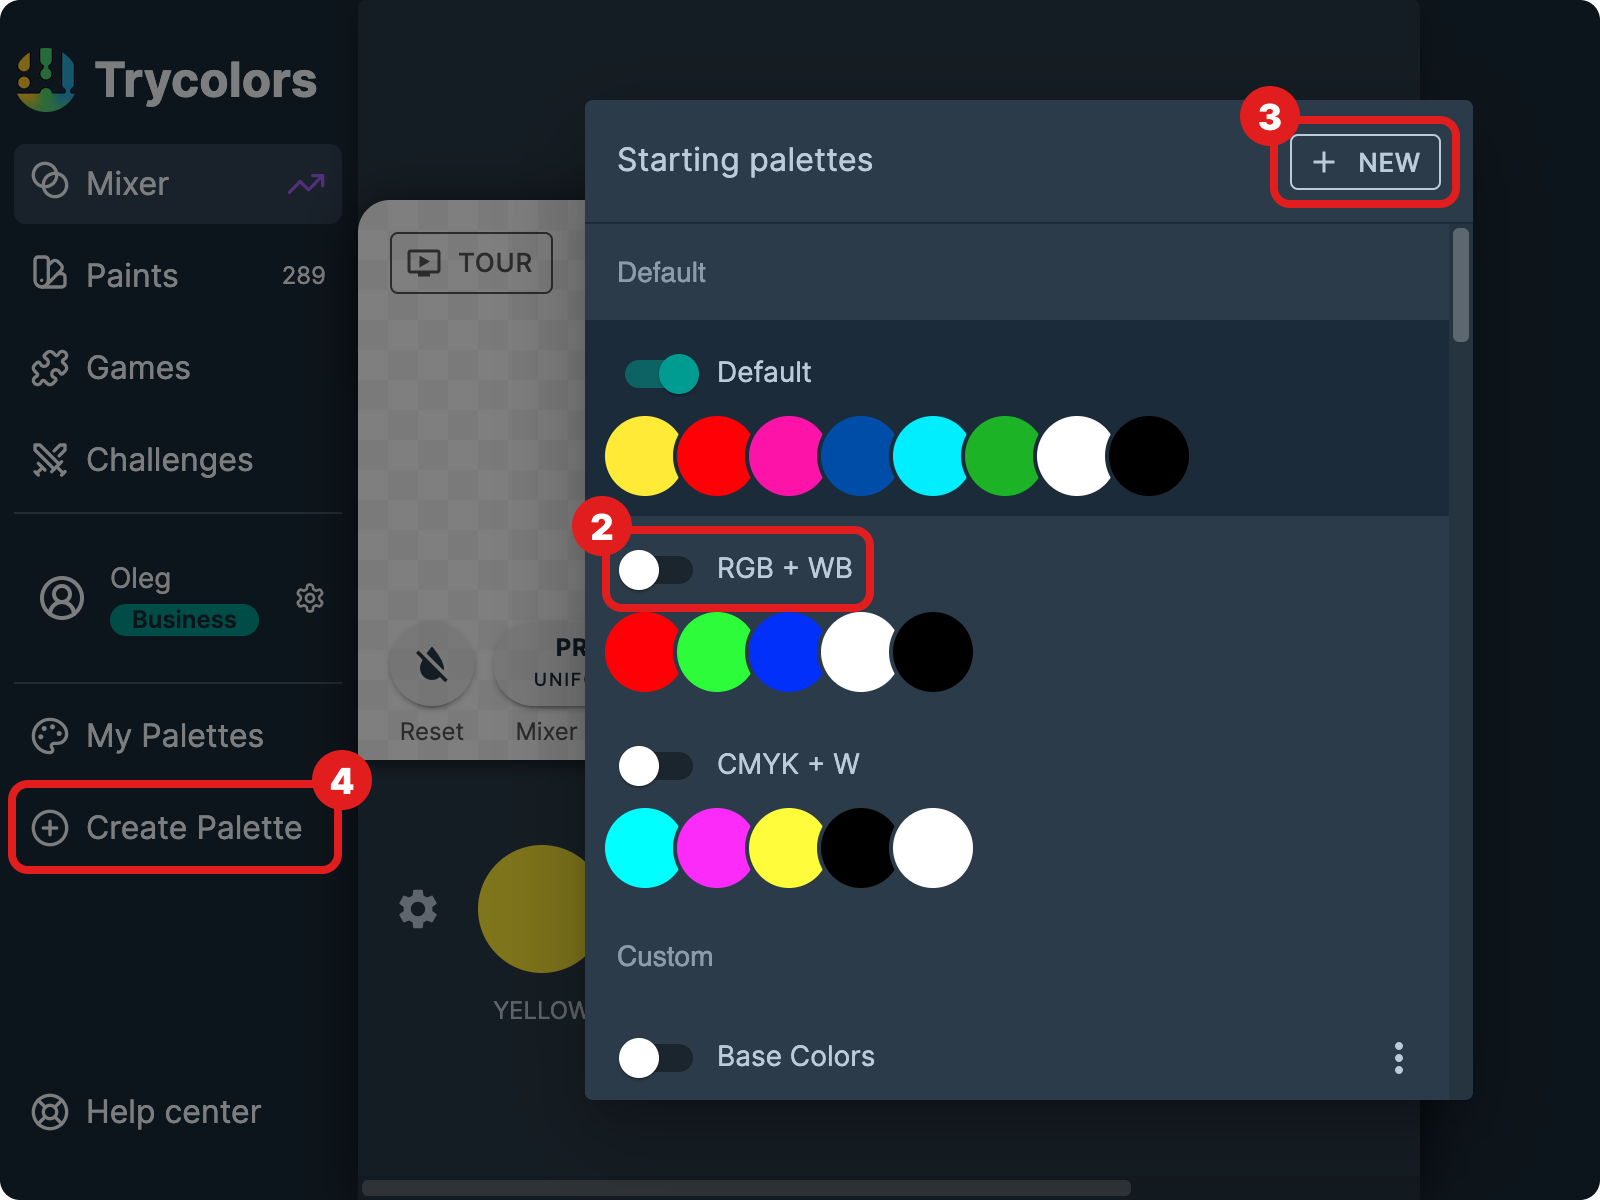
Create a New Palette (Optional)
If you want to create a new palette, click the "+ NEW" button in the top right corner of the modal.
Apply Changes
The selected palette will be immediately applied to your mixer.
You can also create a new palette by clicking "Create Palette" in the main menu.
Creating and Editing Your Starting Palette
To create or edit your own starting palette:
Access the Palette Creator
Click "Create Palette" in the main menu or navigate to https://trycolors.com/user (opens in a new tab) and click on the starting palette you want to edit.
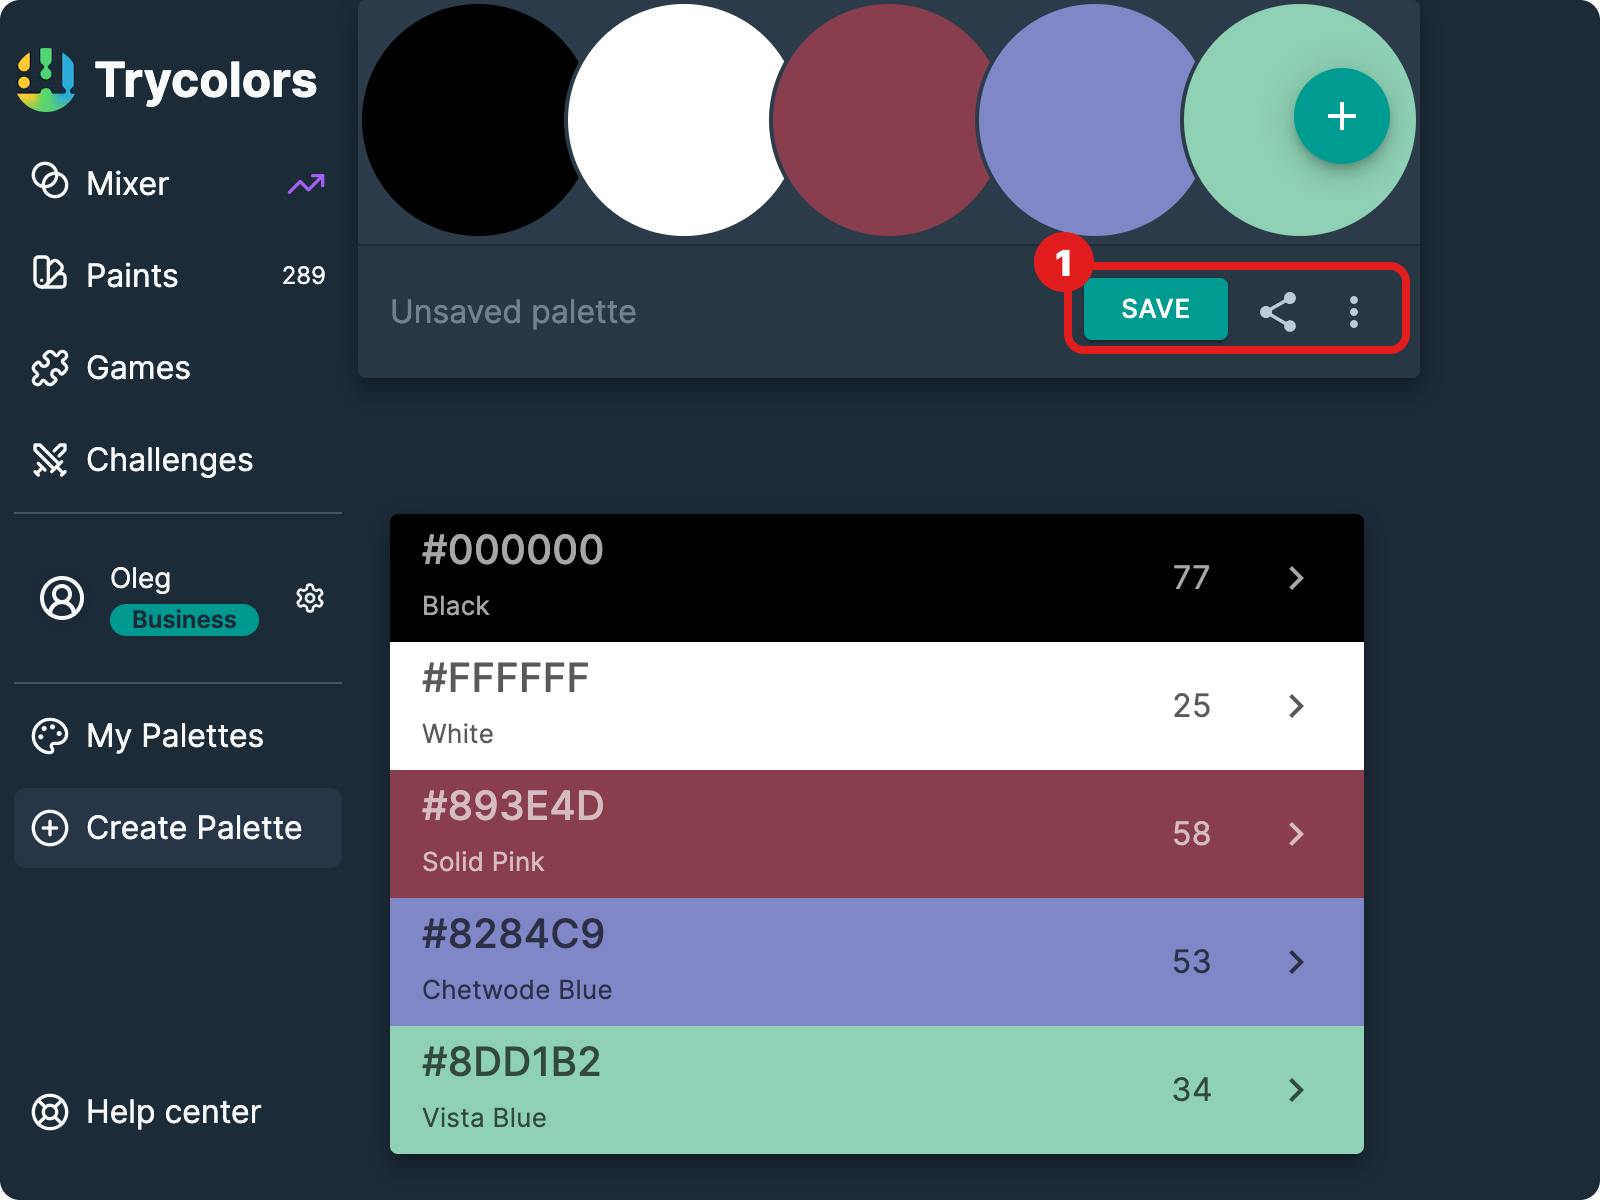
Save the Initial Palette
You'll see a randomly generated palette. If you like it, click the "SAVE" button.
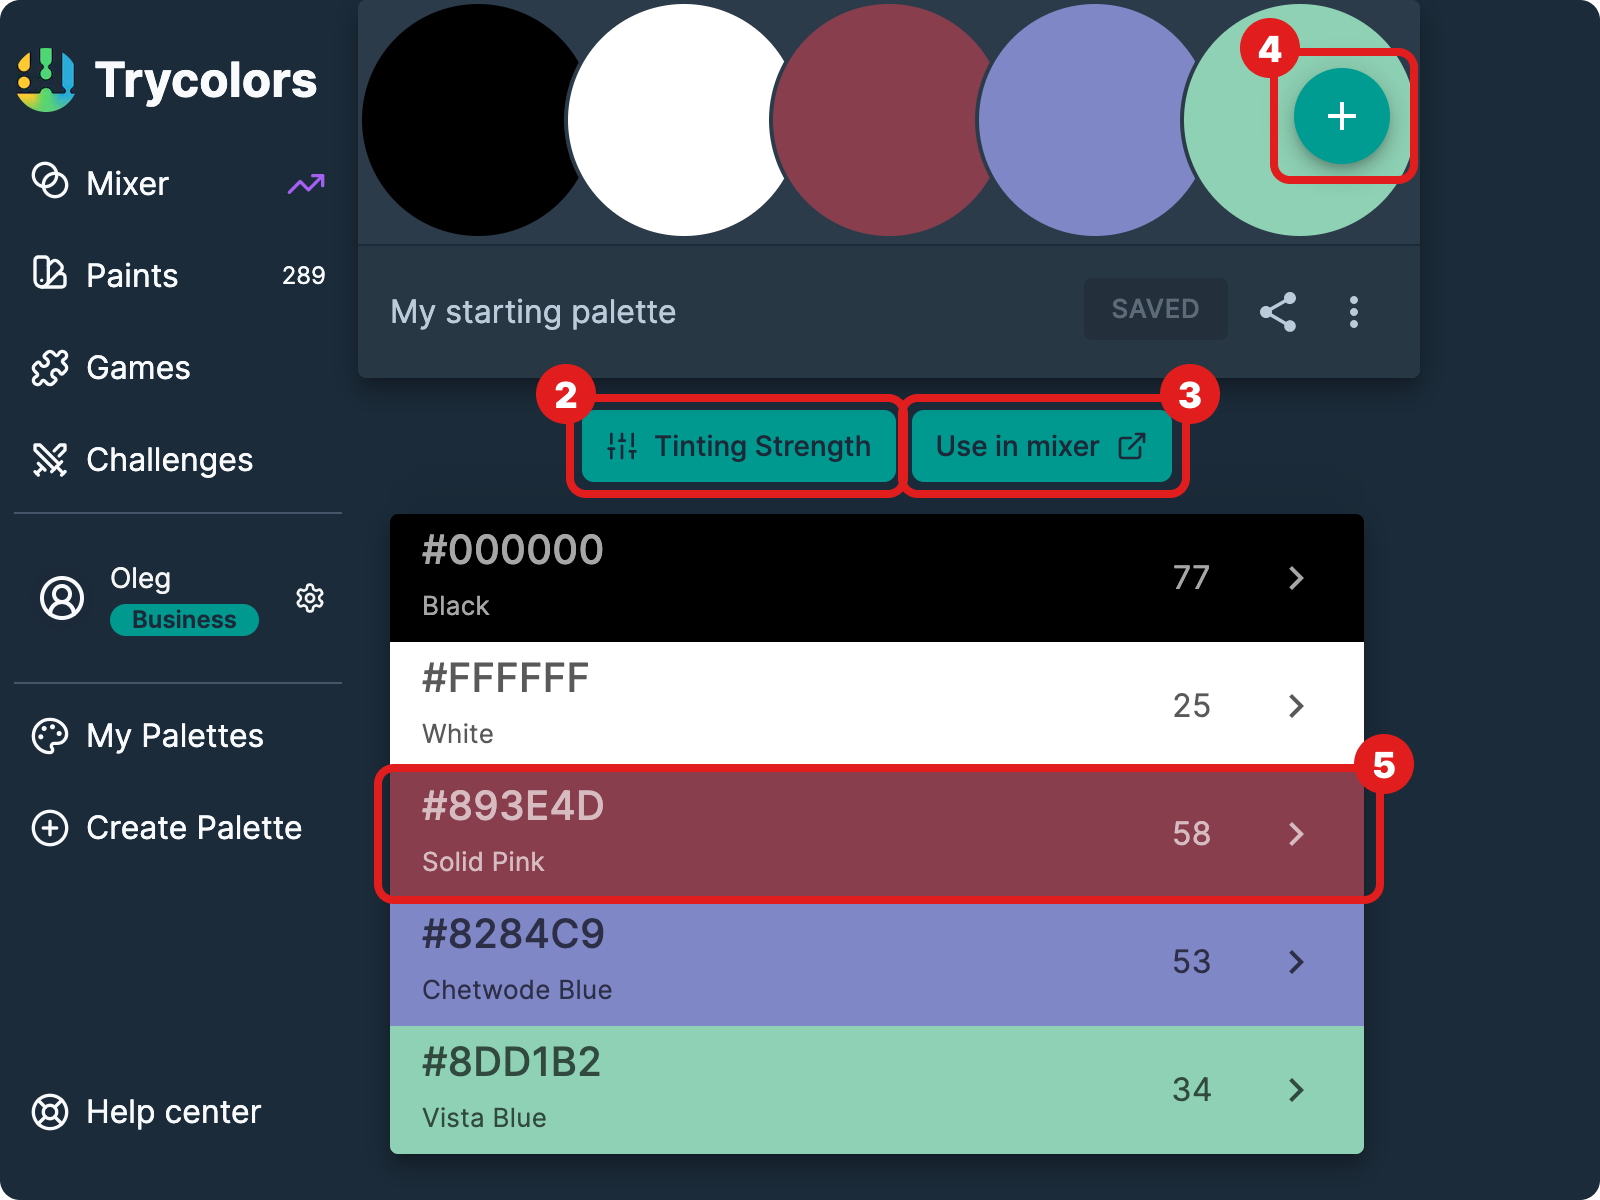
Customize Your Palette
Once saved, you have several options:
- Change tinting strength (see Tinting Strength Mode for more details)
- Use it in mixer by clicking "Use in mixer"
- Add more colors by clicking the "+" button
- Modify existing colors by clicking on them
Edit Individual Colors
When you click on a color, a modal will open where you can:
- Use the color picker
- Upload a photo to pick a color
- Choose from the extensive paints library
- Reorder colors in your palette using the arrow buttons at the top of the modal
- Rename the color using the pencil icon next to the color name
- Remove the color from your palette using the trash can icon
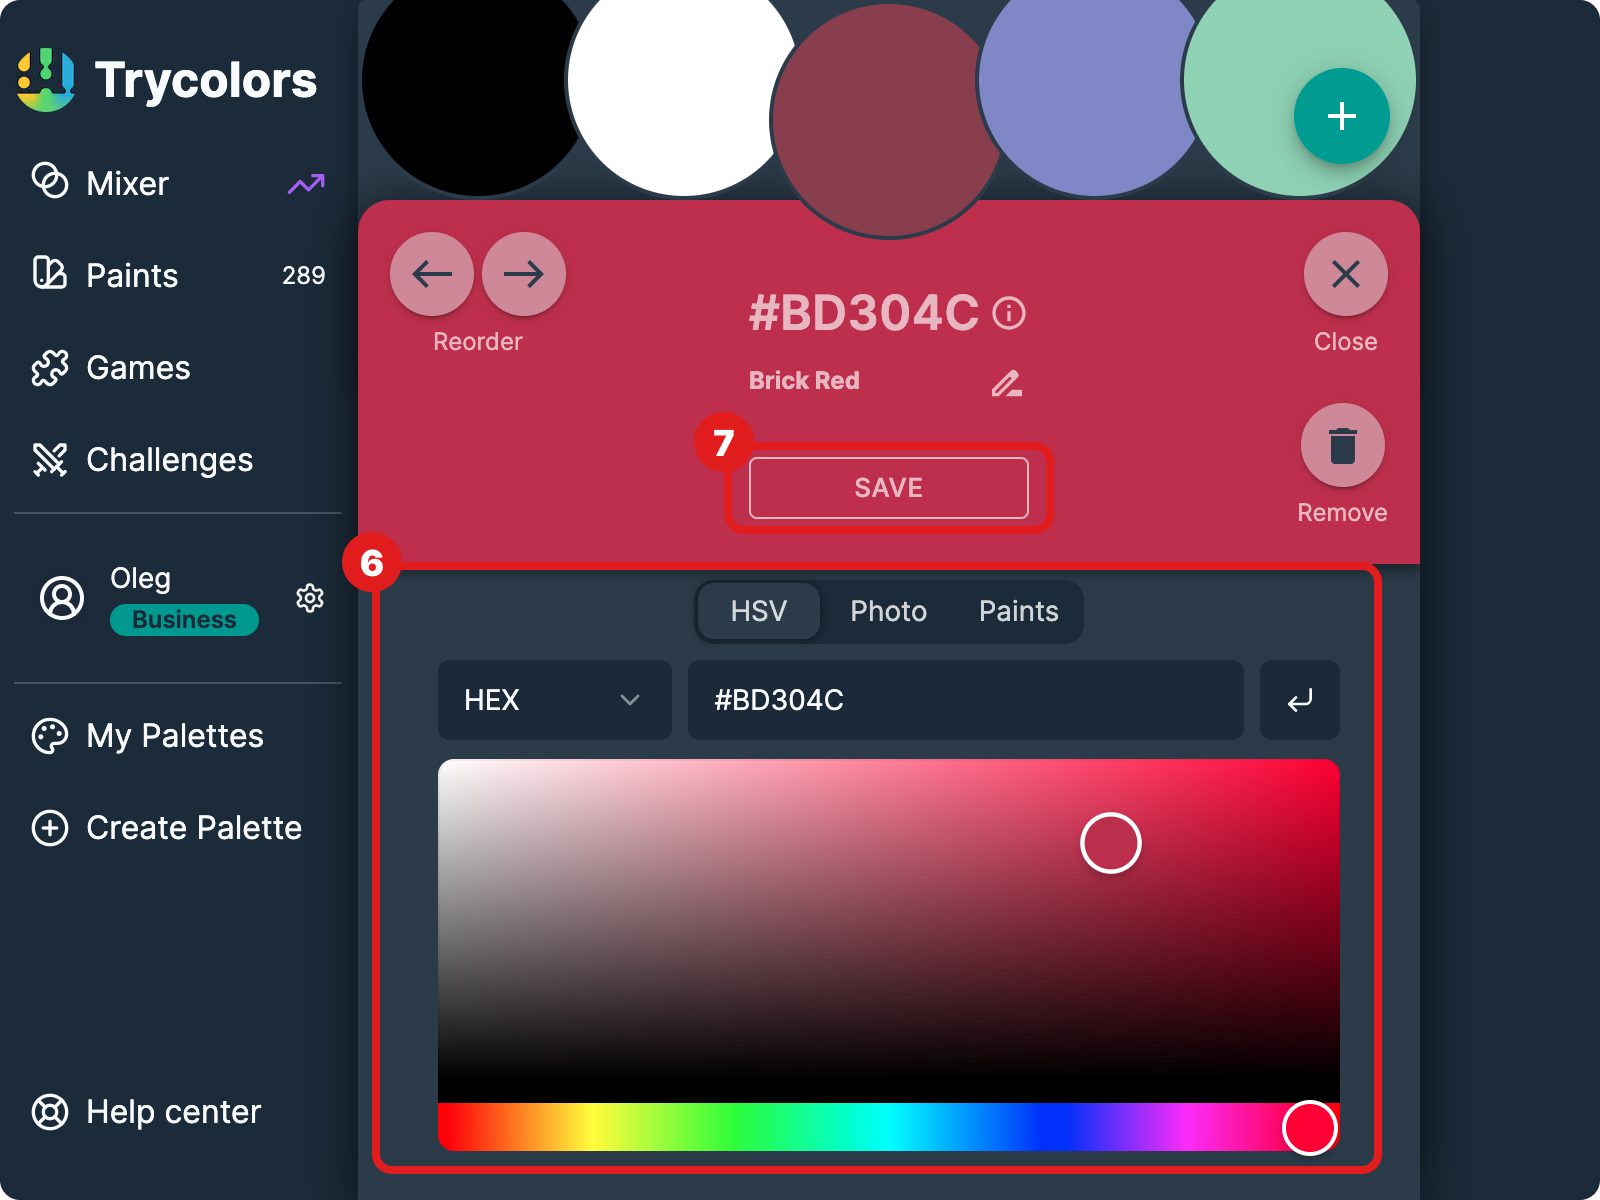
Save Your Changes
After making changes, click "SAVE" in the color editing modal.
Once the edit color modal is closed, all changes are saved automatically. You don't need to manually save the entire palette after each color edit.
Manage Your Palette
You can also:
- Rename your palette by clicking on its name
- Remove your palette by clicking the three-dot menu and selecting "Remove"
Experiment in the Mixer
Use your new palette in the mixer to see how it works for your color mixing needs.
While individual color changes are saved automatically, be cautious when making major changes to your palette. It's a good practice to double-check that all your desired changes are reflected before navigating away from the page.
Tips for Creating Effective Starting Palettes
- Include a good range of primary colors (red, blue, yellow).
- Add both light and dark shades for more versatile mixing options.
- Consider including colors that are commonly used in your projects.
- Experiment with different combinations to find what works best for your needs.
What's Next
Now that you know how to create and edit your starting palette, you might want to explore:
- Pro Mixer Mode to use your custom palette with advanced mixing algorithms
- Tinting Strength Mode to adjust the influence of each color in your palette
- Get Mix Feature to automatically calculate color proportions using your custom palette
Remember, the key to mastering color mixing is experimentation. Don't be afraid to create multiple palettes for different projects or purposes!